SO-101 Quick Start Guide
SO-101 Quick Start Guide
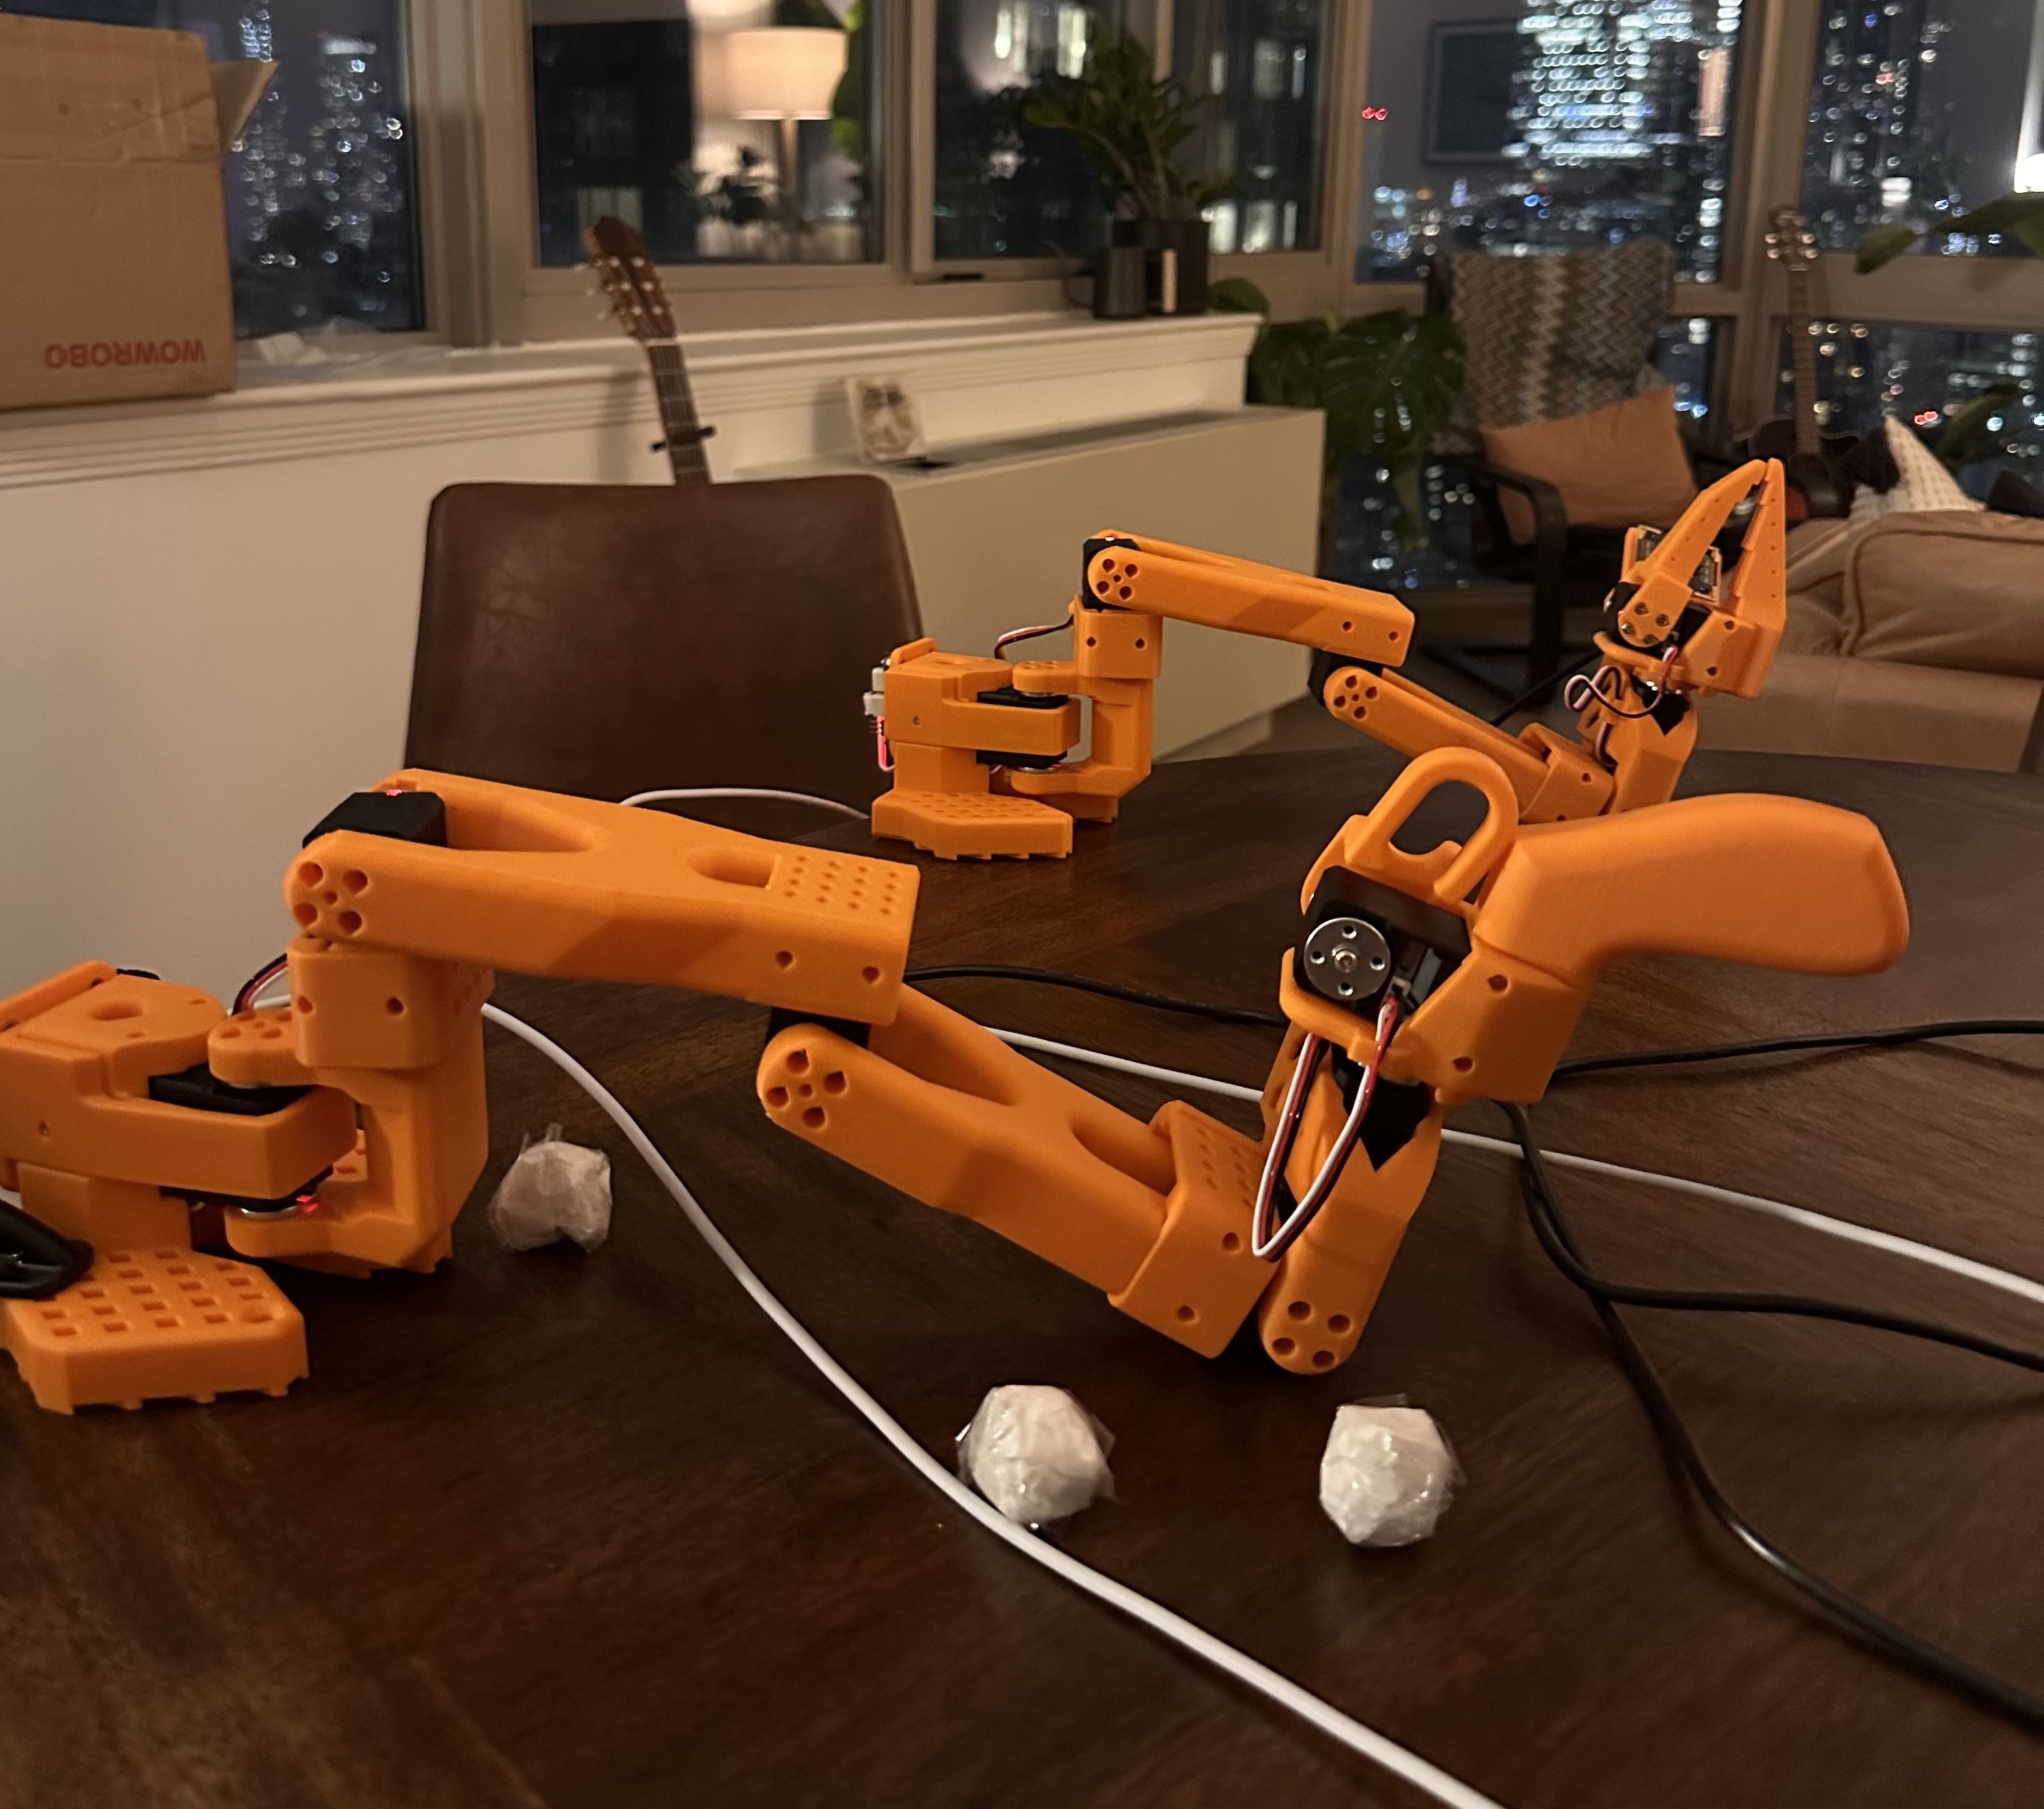
The SO-101 is a robotic arm from LeRobot, a Hugging Face subsidiary. It’s a relatively affordable, beginner-friendly option for getting hands-on experience with robotics.
How to Get One
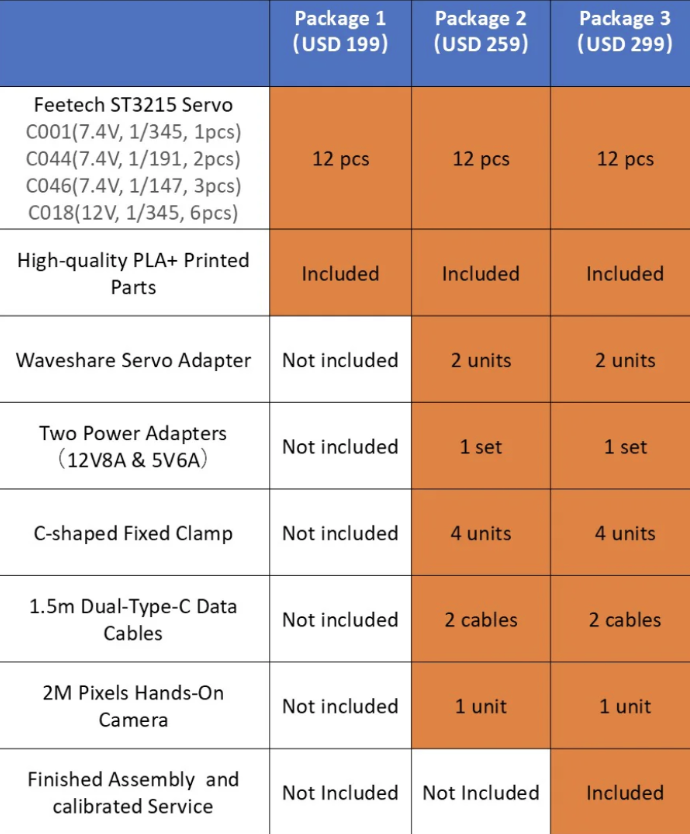
You can 3D print the SO-101 yourself using Hugging Face’s open-source files, or purchase a preassembled version from vendors like WowRobotics. For beginners, I highly recommend the preassembled route. I personally went with WowRobotics’ “Package 3,” which includes:
- 1 Leader Arm
- 1 Follower Arm
- 1 Camera
- All necessary cables
The total cost was around $300 USD plus ~$100 USD for shipping. It took about 3 weeks to arrive from China, but everything came in perfect condition and worked out of the box.
Physical Setup
Place the robotic arms on a flat, stable surface. Connect the USB-C and USB cables as described in the instructions.
Software Setup
The official installation guide is great. The steps below are specific to the SO-101 and should work on an Apple Silicon (M-series) Mac.
git clone https://github.com/huggingface/lerobot.git
cd lerobot

conda create -y -n lerobot python=3.10
conda activate lerobot

conda install ffmpeg -c conda-forge

pip install -e .
pip install -e ".[feetech]"
Tele-operating the Arm
Once installed, you’re ready to calibrate the robot and run the teleoperation script—assuming you have a Leader arm, Follower arm, and USB camera.
python -m lerobot.teleoperate \
    --robot.type=so101_follower \
    --robot.port=/dev/tty.FOLLOWER_NAME \
    --robot.id=my_awesome_follower_arm \
    --teleop.type=so101_leader \
    --teleop.port=/dev/tty.LEADER_NAME \
    --teleop.id=my_awesome_leader_arm \
    --robot.cameras="{ front: {type: opencv, index_or_path: CAMERA_INDEX_NUM, width: 1920, height: 1080, fps: 5}}" \
    --display_data=true
You’ll need to replace the placeholders FOLLOWER_NAME, LEADER_NAME, and CAMERA_INDEX_NUM. Here’s how:
Finding USB Ports and Camera Index
To identify your follower or leader USB port, connect one device at a time and run:
python -m lerobot.find_port
The script will walk you through identifying the port by asking you to unplug the device. Example:
- Follower arm →
usbmodem5A460848031 - Leader arm →
usbmodem5A680120771
To detect your camera:
python -m lerobot.find_cameras
If you purchased the WowRobotics kit, your camera is most likely:
- Width: 1920
- Height: 1080
- FPS: 5
- Index: 0
Note: You may need to try a few configurations to find the right camera, especially if your machine has a built-in webcam.
Example final command:
python -m lerobot.teleoperate \
    --robot.type=so101_follower \
    --robot.port=/dev/tty.usbmodem5A460848031 \
    --robot.id=my_awesome_follower_arm \
    --teleop.type=so101_leader \
    --teleop.port=/dev/tty.usbmodem5A680120771 \
    --teleop.id=my_awesome_leader_arm \
    --robot.cameras="{ front: {type: opencv, index_or_path: 0, width: 1920, height: 1080, fps: 5}}" \
    --display_data=true
Calibration
Once you run the script, it will guide you through the calibration process. For example:
“Move my_awesome_follower_arm SO101Follower to the middle of its range of motion and press ENTER.”
Take this part seriously—improper calibration can lead to wild arm movements and even hardware damage.
Tip: Here’s the neutral position that worked best for my follower arm:
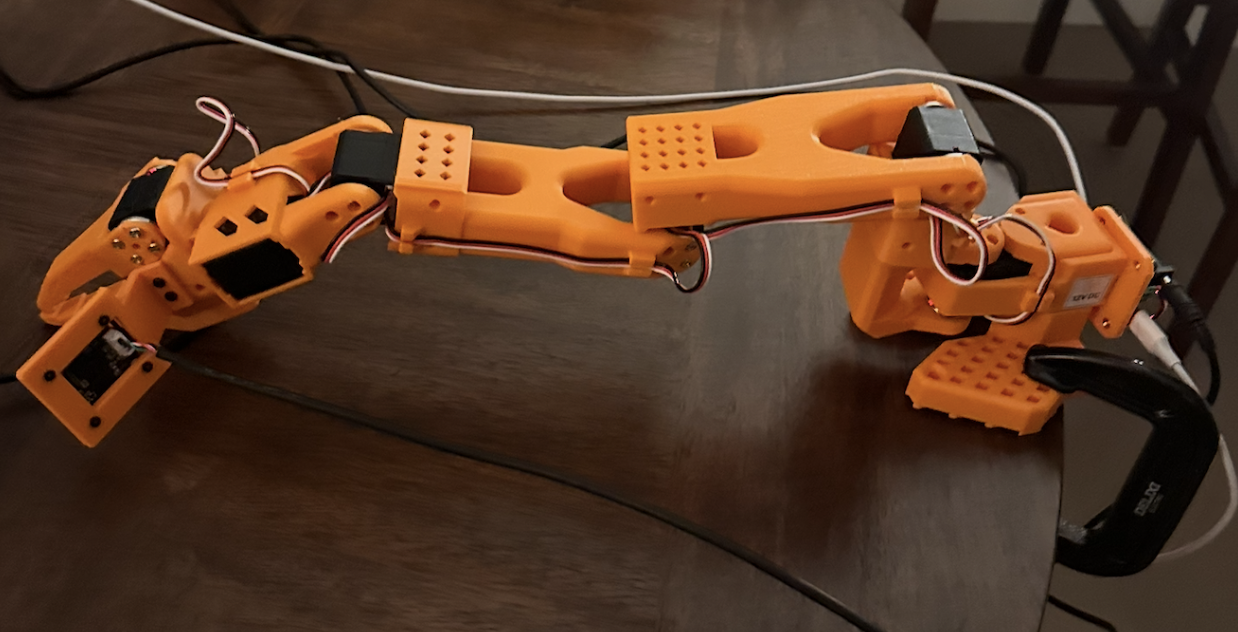
Make sure your robot is securely clamped and cannot hit anything during initialization. At the end of the calibration, the arm might swing quickly, so be prepared.
End Result
Once calibrated, your follower arm should mimic the movements of your leader arm in real-time. It’ll also launch a GUI via rerun that shows timeseries movements of the robotic arm along with a realtime camera view.
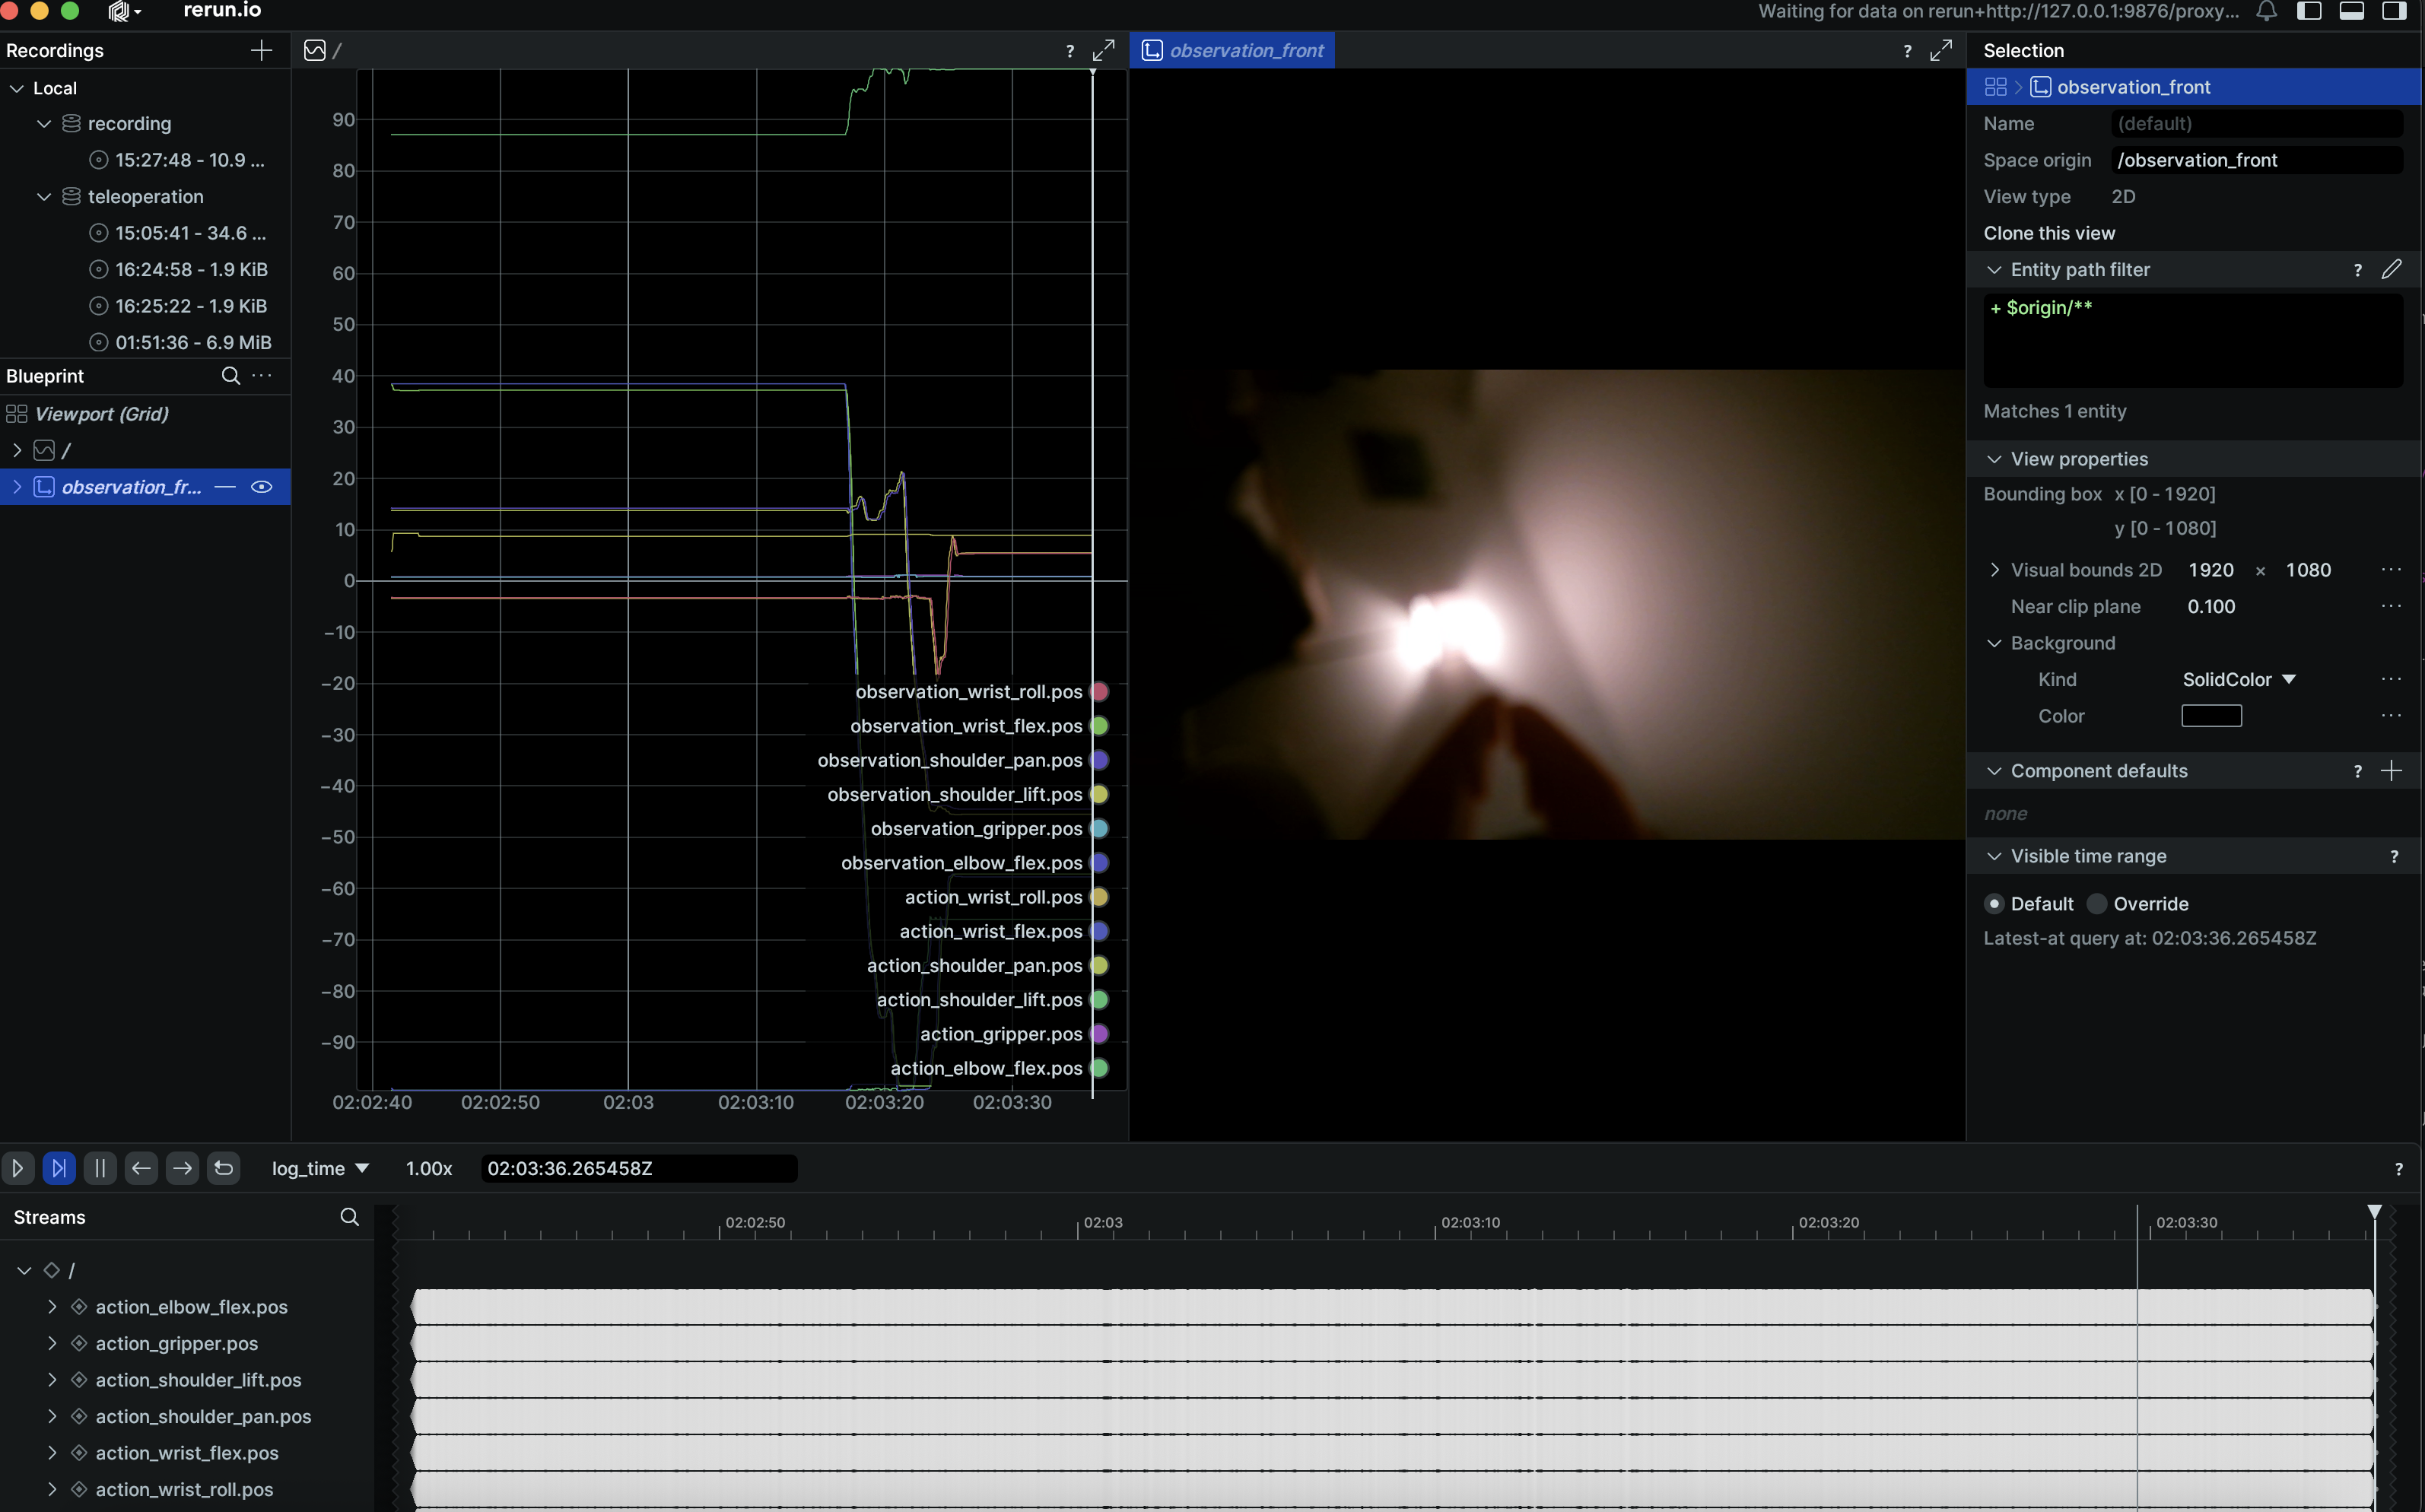
If the movements don’t align well, re-run the calibration.
What’s Next
In the next post, I’ll cover how to record teleoperation routines and start collecting data for training.